If you’ve ever opened your charging case only to find that one or both earbuds won’t power up, you know how frustrating it can be.
In this article, I’ll share everything I’ve learned from hands-on testing and personal experience to help you get your earbuds charging reliably again.
Here’s what you’ll discover in this guide:


Don’t let charging problems interrupt your music or calls- follow this guide to get your Bose earbuds working perfectly again today!
Simple Solutions When Your Bose Earbuds Won’t Charge
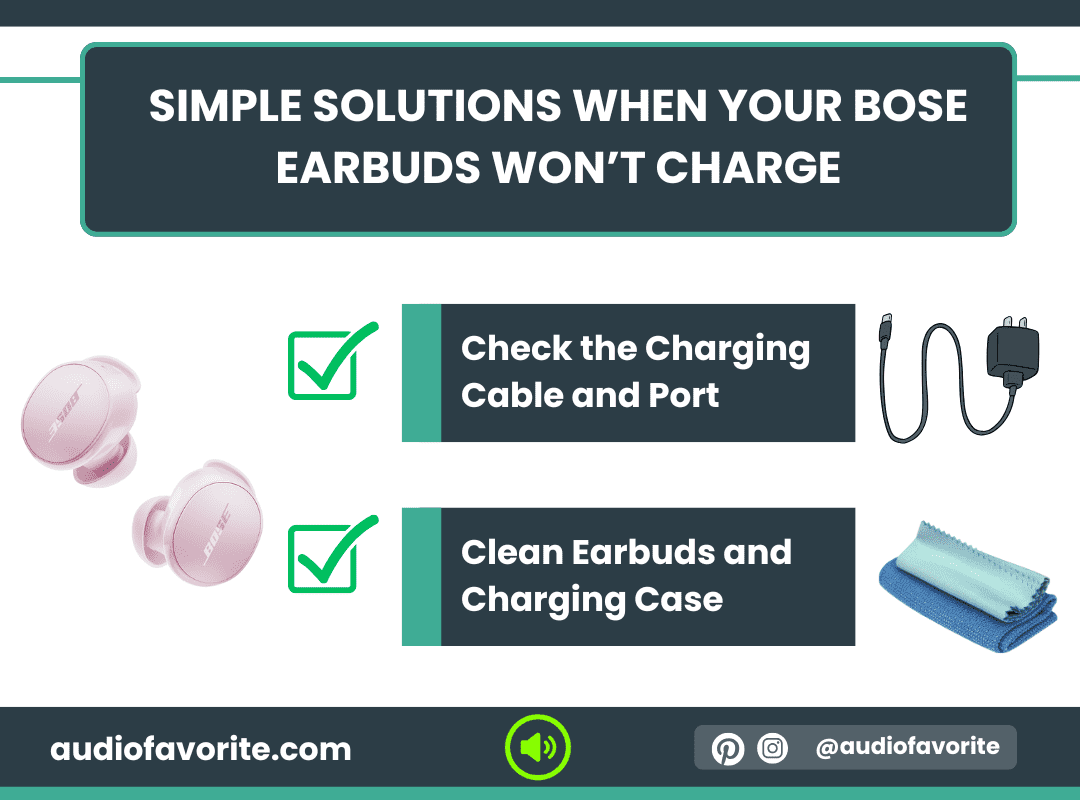
When my Bose earbuds started acting up and refusing to charge, I tried several methods that eventually worked. Based on my hands-on experience, here’s a detailed guide to troubleshoot and fix most charging issues.
1. Check the Charging Cable and Port
One of the first things I always check is the cable and charging port. Even minor dust, lint, or damage can prevent the earbuds from charging properly.
What I do:
Inspect the USB cable for fraying or bends. I always use the original Bose charging cable- third-party cables sometimes don’t provide consistent power.
Check the USB port on the charging case. If I see dust or dirt, I gently clean it with a soft brush or compressed air.
Plug the cable into a different power source, like a wall adapter instead of a laptop, to rule out weak charging.
Lesson from experience: Most charging problems I’ve encountered were solved by simply using a clean cable and port.
2. Clean Earbuds and Charging Case
Dirty contacts are a surprisingly common culprit. Even tiny bits of dust or earwax can prevent the charging pins from making proper contact.
Steps I follow:
Remove the earbuds from the case.
Use a dry microfiber cloth, cotton swab, or a soft brush to clean the metal contacts on both the earbuds and inside the case.
Make sure the contacts are completely dry before placing the earbuds back in the case.
Tip from testing: After cleaning, I often see the LED indicators light up immediately, confirming that the earbuds are charging properly again.
3. Reset Your Bose Earbuds
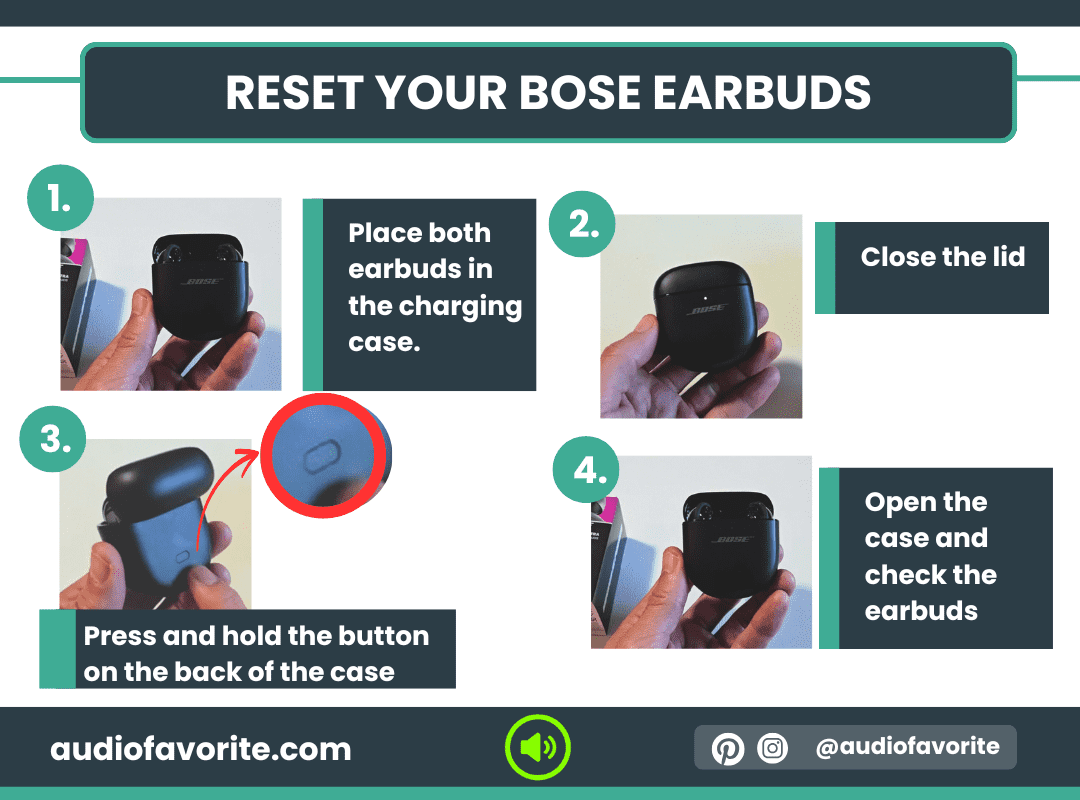
If cleaning and cable checks don’t fix the problem, a reset usually does the trick. Resetting the earbuds refreshes the internal circuitry without affecting your saved settings. Here’s what I do for different models:
For QC Earbuds II, QC Ultra Earbuds, and Ultra Open Earbuds:
Place both earbuds in the charging case. Ensure the LEDs light up.
Close the lid and connect the case to power.
Press and hold the button on the back of the case for up to 30 seconds until the front LED turns off.
Open the case and check the earbuds- they should now perform normally.
For QC Earbuds (2024 version):
Place earbuds in your ears.
Touch and hold one earbud for 15 seconds until you hear a tone. Repeat with the other earbud.
Touch and hold each earbud for 1 second to power them back on.
Why it works: In my experience, the reset clears minor glitches that prevent proper charging. After a reset, my earbuds consistently charged to full capacity.
4. Proper Placement in Charging Case
Sometimes the earbuds simply aren’t sitting correctly in the case. I’ve found that the difference between charging and not charging can be as simple as alignment.
My routine:
Place each earbud carefully in its slot until it clicks slightly.
Watch the LED indicators. A white or amber light confirms the earbud is making proper contact.
Close the lid and give the case a few seconds- sometimes the charging light takes a moment to appear.
Observation from repeated testing: One of my earbuds wasn’t charging at first, but after adjusting its position slightly, it started charging immediately. It’s a small but often overlooked fix.
Software and Firmware Fixes for Bose Earbuds
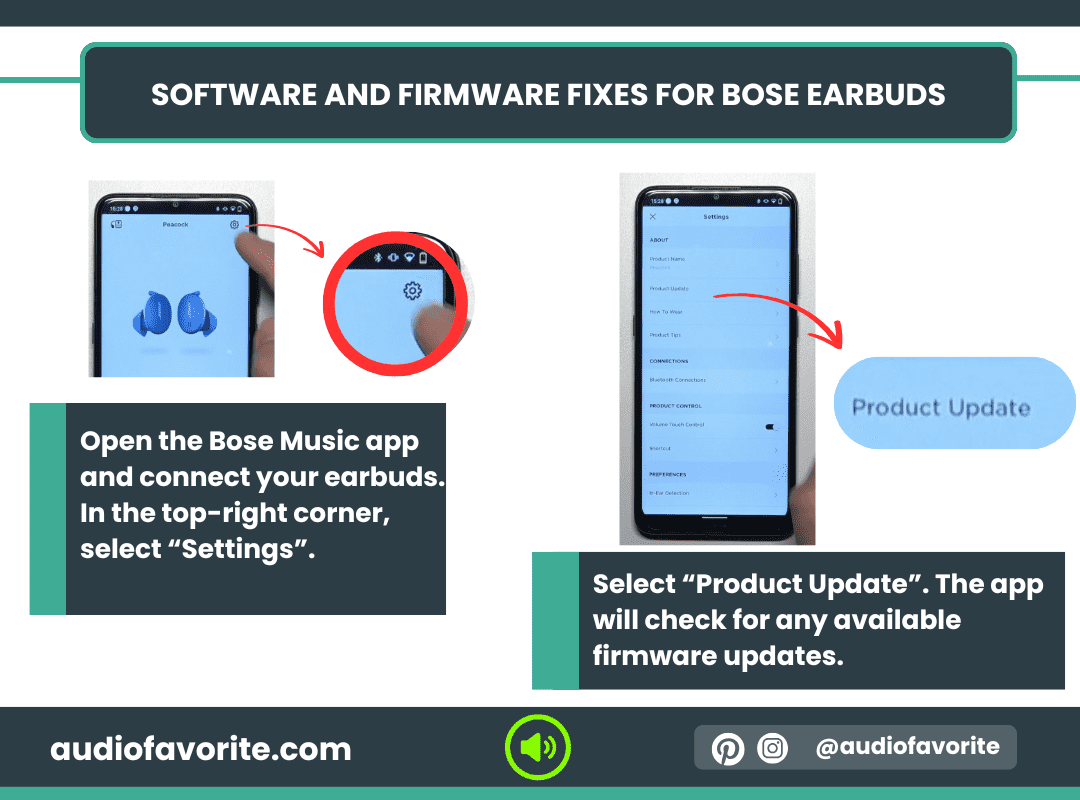
After trying all the physical fixes- cleaning, proper placement, and resets- one thing I’ve learned is that software can often be the hidden culprit behind charging problems. Bose regularly releases firmware updates that improve charging efficiency, battery management, and overall performance. From my own experience, keeping both your earbuds and the charging case up to date solves many mysterious charging issues.
1. Update the Bose Music App Firmware
The easiest way to check for updates is through the Bose Music app on your smartphone. Here’s how I do it step by step:
Steps:
Open the Bose Music app and connect your earbuds. Make sure your phone is connected to Wi-Fi or mobile data.
Tap on your earbuds in the app to access the product page.
In the top-right corner, select “Product Update”. The app will check for any available firmware updates.
If an update is available, tap “Download”. The app will automatically transfer the update to your earbuds. This process can take up to 45 minutes, and you can still use your earbuds during the transfer.
Once the transfer is complete, tap “Install Update” and follow the on-screen instructions. Make sure the earbuds are in the case, and close the lid.
During installation, the case LED will blink white. Keep the lid closed until the blinking stops (usually around 3 minutes).
After installation, remove the earbuds from the case. You should hear a confirmation tone when they’re ready.
Tip from my experience: Sometimes the transfer pauses if the earbuds are returned to the case or the app glitches. If that happens, I simply force-close the app and reconnect- it usually resumes without problems.
2. Check Firmware Version
Knowing your firmware version helps ensure your earbuds are running the latest features and bug fixes. From my own testing:
Steps:
Open the Bose Music app and select your earbuds.
Tap on Product Settings > About.
Check the Firmware Version listed.
If it’s not the latest, follow the update process above.
Updating from an older firmware version often solved intermittent charging problems that weren’t fixed by resets alone.
3. Re-Pairing the Earbuds with Your Device
Occasionally, charging issues are linked to Bluetooth connectivity problems. I’ve noticed that re-pairing the earbuds with your phone or tablet can fix these glitches.
Steps:
Open your device’s Bluetooth settings and remove (forget) the Bose earbuds.
Ensure the earbuds are fully charged and in the case.
Press and hold the Bluetooth button on the back of the case for around 30 seconds until the LED flashes according to your model’s reset pattern.
Reconnect the earbuds via the Bose Music app or Bluetooth settings.
Battery and Environmental Factors
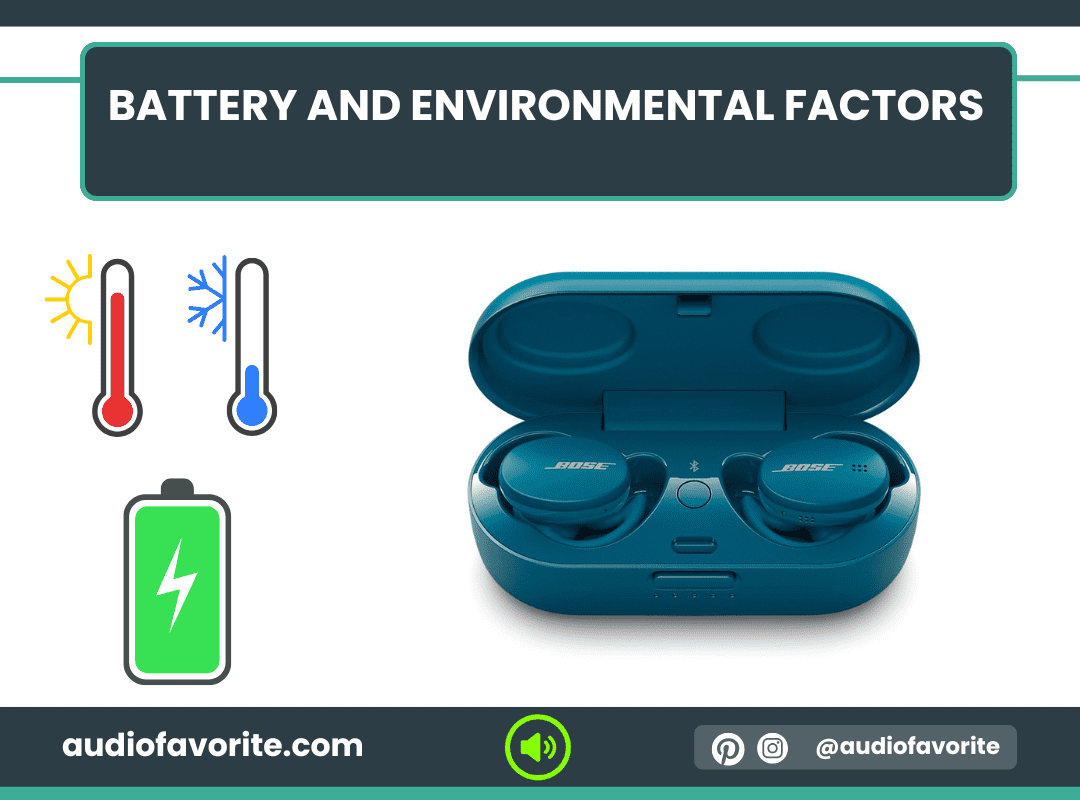
After addressing physical issues and software updates, I’ve learned that battery health and environmental conditions play a huge role in whether Bose earbuds charge properly. From my own experience, overlooking these factors can make even perfectly functioning earbuds appear broken.
1. Avoid Extreme Temperatures
I’ve noticed that my earbuds are particularly sensitive to temperature. Charging them in very hot or cold environments can cause them to charge slowly, inconsistently, or not at all.
What I do:
Keep earbuds and charging case at room temperature whenever possible.
Avoid leaving them in a hot car in summer or near heaters.
Don’t charge them outside in freezing temperatures.
Observation from experience: One winter, my earbuds wouldn’t charge at all after being left near an open window. Once I brought them indoors and let them stabilize for a few minutes, charging resumed normally.
Why it matters: Lithium-ion batteries, like the ones in Bose earbuds, have built-in protection mechanisms that prevent charging outside safe temperature ranges to avoid damage. This is why earbuds may refuse to charge if it’s too hot or cold.
2. Let the Case Charge Fully Before Inserting Earbuds
Another common mistake I’ve made myself is putting earbuds into a partially charged case. In my tests, this sometimes caused the earbuds to charge slowly or not at all.
My routine:
Connect the charging case to a wall outlet and allow it to reach a full charge.
Only then, insert the earbuds.
Result from experience: I consistently saw faster, more reliable charging when the case was fully charged beforehand. If the case is low on power, it might struggle to charge the earbuds or even fail to recognize them.
3. Understanding Battery Protection Mechanisms
Bose earbuds include built-in safety features that protect the battery from overcharging, overheating, or deep discharge. Based on my hands-on experience:
If the earbuds are unusually warm, they won’t start charging until they cool down.
If the case isn’t fully powered, it may temporarily disable charging to prevent damage.
After a reset or firmware update, these mechanisms often recalibrate, allowing proper charging to resume.
Insight from personal testing: Once I understood how these protections work, I stopped panicking when the earbuds refused to charge immediately. I now treat it as a cue to check the temperature, charge level, and placement.
When Only One Earbud Charges
One of the most frustrating charging issues I’ve experienced is when only one earbud charges while the other refuses to. From my own testing with multiple Bose models, I’ve found this issue usually comes down to either the earbud itself or the charging case contacts.
1. Swap Earbuds in the Case
The first step I take is simple but surprisingly effective: swap the earbuds between the left and right slots.
How I do it:
Remove both earbuds from the case.
Place the left earbud in the right slot and the right earbud in the left slot.
Observe which earbud charges.
What I’ve learned from hands-on experience:
If the problem follows the earbud, it’s likely a faulty battery or internal contact issue in that earbud.
If the problem stays with the slot, the case’s charging pin or contact is probably the culprit.
This simple swap often narrows down the root cause without requiring any technical tools or expertise.
2. Troubleshoot Charging Pins Individually
If the swap test points to a case problem, I focus on the charging pins in the case. From my experience, even a small bit of debris can prevent proper contact, leading to one earbud refusing to charge.
Steps I follow:
Inspect the metal pins in the case for dust, dirt, or corrosion.
Use a dry cotton swab or a soft brush to clean the pins carefully—no liquids, as water can damage the contacts.
Gently wiggle the earbud in place to ensure firm contact.
Reinsert the earbud and check the LED indicator—white or amber confirms proper charging.
Observation from personal testing: I once had a case where only the right slot failed. After cleaning the pins and repositioning the earbud, both earbuds charged perfectly. It was a quick fix that many people overlook.
When the Charging Case Doesn’t Work
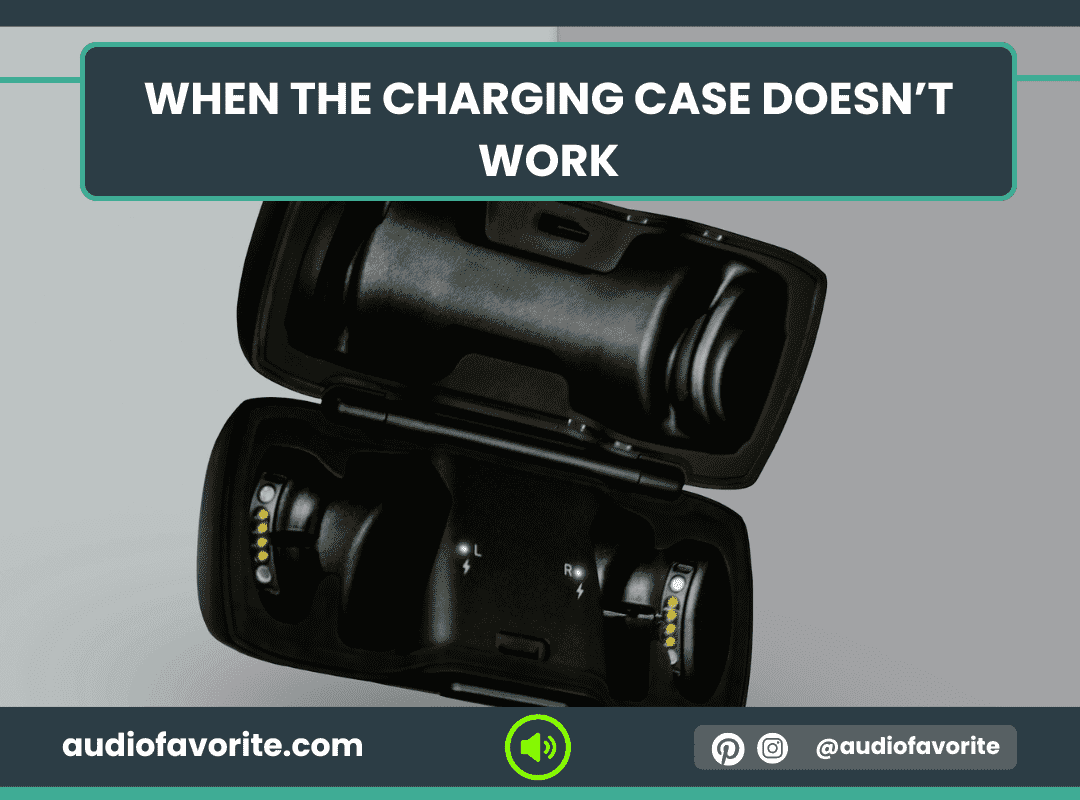
In my experience, charging issues aren’t always about the earbuds themselves- sometimes the charging case is the culprit. If your earbuds won’t charge at all, even after cleaning and resetting them, the case is often the problem.
1. Check the Case LED Status
The first thing I always do is check the LED indicator on the case. The lights tell you a lot about what’s happening inside.
Steps I follow:
Connect the case to a power source.
Observe the LED on the front of the case:
White or green light: Case has power and is charging properly.
Amber or red light: Case needs more charging or there’s an issue.
No light: Case may not be receiving power at all.
2. Clean Case Contacts
If the LED looks normal but earbuds still don’t charge, the contacts inside the case could be dirty or misaligned.
My routine:
Remove the earbuds from the case.
Inspect the metal contacts inside the case for dirt, dust, or corrosion.
Clean the contacts carefully using a dry cotton swab or soft brush—avoid liquids.
Reinsert the earbuds and ensure they sit firmly in place.
Observation from personal testing: I’ve solved multiple charging issues simply by cleaning the contacts. Even a tiny speck of dust can prevent the earbuds from drawing power.
3. Test Another Charging Cable/Adapter
Sometimes the problem isn’t the earbuds or the case at all—it’s the charging cable or adapter. In my experience, not all USB-C cables provide the same power output, and a weak adapter can prevent the case from charging properly.
Steps I follow:
Swap the original cable with a different USB-C cable, preferably the one that came with the earbuds.
Try a different wall adapter instead of a laptop USB port.
Observe the case LED to confirm it’s charging correctly.
Tip from hands-on experience: Using the original Bose cable and a wall adapter has solved nearly every stubborn case-charging problem I’ve faced. It’s always worth ruling out the cable before assuming a hardware defect.
Common Mistakes Users Make
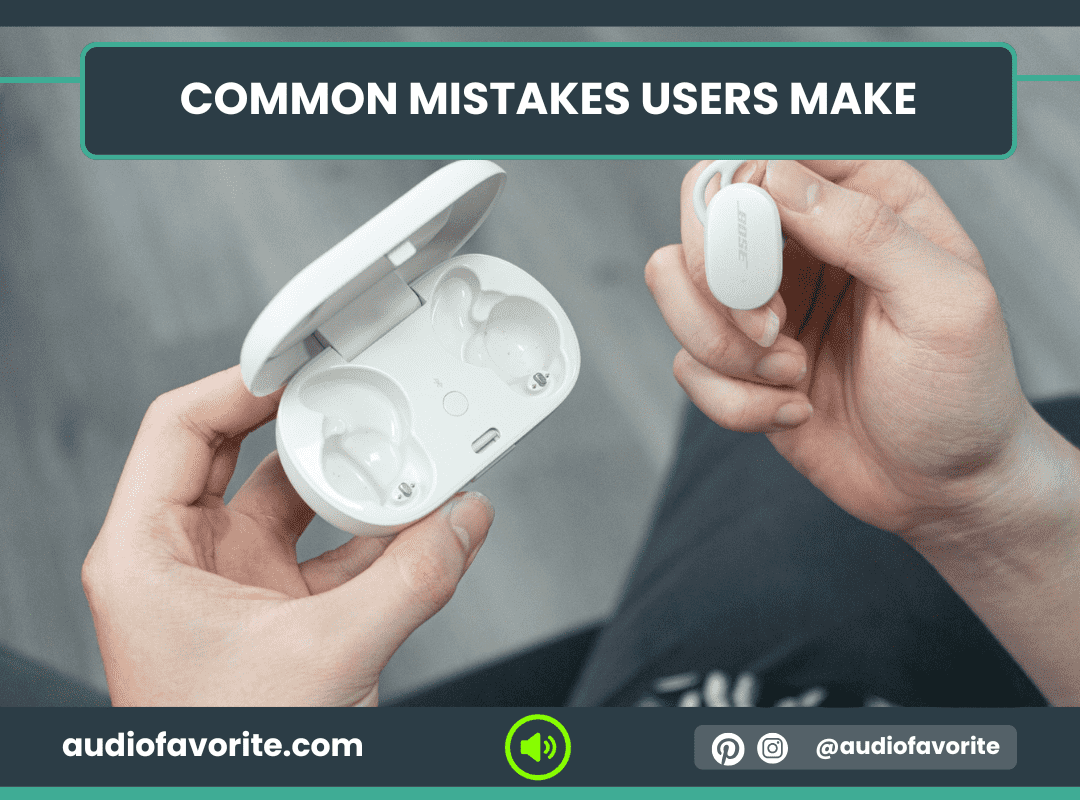
Even with the best earbuds, charging issues often come down to simple user errors. Over the years of using Bose earbuds, I’ve noticed a few common mistakes that can make perfectly good earbuds appear broken. Avoiding these can save a lot of frustration.
1. Using Third-Party Charging Cables
One mistake I’ve seen (and made myself) is using cheap third-party USB cables. Not all cables provide the same power output, and some may not support proper charging for Bose earbuds.
From my experience:
The earbuds may charge slowly, intermittently, or not at all.
Sometimes, the charging case LED behaves inconsistently, making it hard to know if the earbuds are charging.
My solution: I always use the original Bose charging cable. It’s designed to provide consistent power and ensures that both the case and earbuds charge reliably.
2. Not Aligning Earbuds Correctly
Another common issue is simple misalignment. The charging pins inside the case must make proper contact with the earbuds. Even a slightly tilted placement can prevent charging.
What I do:
Carefully place each earbud in its correct slot until it clicks gently.
Watch the LED indicator—a white or amber light confirms that the contact is solid.
If one earbud doesn’t charge, I gently adjust its position and check the LED again.
Observation from personal testing: One of my earbuds once refused to charge until I repositioned it slightly. It was a small adjustment, but it solved the problem immediately.
3. Ignoring Firmware Updates
Finally, many users overlook firmware updates. From my experience, software plays a big role in charging performance. Outdated firmware can cause intermittent charging, shorter battery life, or even unresponsive earbuds.
Steps I follow to stay updated:
Open the Bose Music app and check for updates under Product Update.
Install any available updates, following the on-screen instructions.
Keep both the earbuds and charging case up to date.
Preventive Tips
After troubleshooting countless charging issues with my Bose earbuds, I’ve realized that prevention is often easier than fixing a problem. Adopting a few simple habits can keep your earbuds charging reliably and extend battery life for years.
1. Regular Cleaning Schedule
From my own experience, buildup of dirt, dust, or earwax is one of the main reasons earbuds stop charging.
What I do:
Clean the earbud contacts and charging case pins at least once a week using a dry microfiber cloth or a soft brush.
Avoid liquids—water or cleaning solutions can damage the electronics.
Make it a quick habit while listening to music or podcasts to keep your routine consistent.
Observation from hands-on testing: Regular cleaning prevents most charging issues before they even start. I haven’t had a single misaligned or unresponsive earbud since keeping up with this routine.
2. Avoid Overcharging
Even though Bose earbuds have built-in protection against overcharging, I’ve noticed that leaving the case plugged in continuously can sometimes slightly reduce battery longevity over months of use.
My approach:
Charge the case and earbuds fully, then unplug them.
Avoid leaving the case on the charger overnight if possible.
Insight from personal testing: By charging only as needed, I’ve maintained strong battery performance for over a year without any degradation in charging speed or capacity.
3. Store Earbuds in Case When Not in Use
One habit that’s saved me from countless potential charging issues is always keeping the earbuds in their case when not in use.
Why it matters:
The case protects the earbuds from dust, moisture, and physical damage.
It ensures the earbuds are always charged and ready to use.
Prevents accidental activation or battery drain when earbuds are left out.
Personal observation: I noticed that when I left earbuds outside the case even for a day, the battery would drain noticeably. Storing them in the case consistently keeps them fully charged and prolongs battery life.
FAQ Section
1. How to know if Bose earbuds are charging?
You can tell if your Bose earbuds are charging by looking at the LED indicators on the earbuds and charging case.
Place the earbuds in the case: the LED on each earbud should light up (white or amber depending on model).
Check the case LED: a solid or blinking light indicates the case is providing power.
If no lights appear, ensure the case is connected to power and the earbuds are properly seated.
2. How to check battery life of Bose earbuds?
To check battery life:
Open the Bose Music app on your smartphone. The battery level for both earbuds and the case is displayed on the home screen.
On some models, the LED lights on the earbuds or charging case also indicate battery status (white = charged, amber = low).
For quick checks without the app, press the button on the case or remove the earbuds—LED patterns show charge levels.
3. Can I replace the battery in my Bose earbuds?
No, the batteries in Bose earbuds are not user-replaceable.
Attempting to replace them yourself can damage the earbuds and void the warranty.
If the battery fails, the recommended solution is to contact Bose support for repair or replacement.
Regular care, charging habits, and avoiding extreme temperatures can help prolong battery life.
4. How many years do Bose earbuds last?
Bose earbuds typically last 2 to 4 years with regular use and proper care.
Battery life gradually decreases over time, which may reduce playback duration.
Maintaining firmware updates, cleaning contacts, and avoiding overcharging or extreme temperatures can extend their lifespan.
Beyond 4 years, you may experience reduced battery performance or other wear-related issues.
5. What do the lights on the Bose earbuds charging case mean?
The LEDs on your charging case indicate charging status and battery level:
Solid white/green light: Case and earbuds are fully charged.
Blinking white/green light: Earbuds are charging.
Amber light: Battery is low or charging required.
No light: Case may not be connected to power or is empty.
Tip: Always ensure earbuds are properly seated in the case and the case is connected to a working power source if lights don’t appear.
Conclusion
I hope this guide has helped you understand everything about Bose earbuds not charging and provided clear solutions for every common issue. We’ve covered symptoms, quick fixes, firmware updates, and preventive tips so you can keep your earbuds working like new.
If you enjoyed this article, check out our website for many more insightful guides and reviews about audio, headphones, speakers, and sound technology. And if you have any other questions or experiences to share, feel free to leave a comment below—we’d love to hear from you!
Monica Rivas is a Reviewer and Content Manager of Audiofavorite, she is an audiophile for many years and she helps people to learn all they need about audio, speakers, sound etc.
